CODERS Modules

Explore the CODERS Curriculum!

Select a module from the catalog below to view.

Block Coding

Block Coding and Scratch

Block Coding is a visual programming tool that uses blocks or pictures instead of regular text or complex coding artifacts. Each block represents a command or function that joins blocks in sequences of instructions. It makes coding simpler by focusing on basic ideas instead of complicated details.

Scratch is a block coding interface that lets students create digital stories, games, and animations. It promotes computational thinking and problem-solving skills, creative teaching and learning, self-expression and collaboration, and equity in computing. 
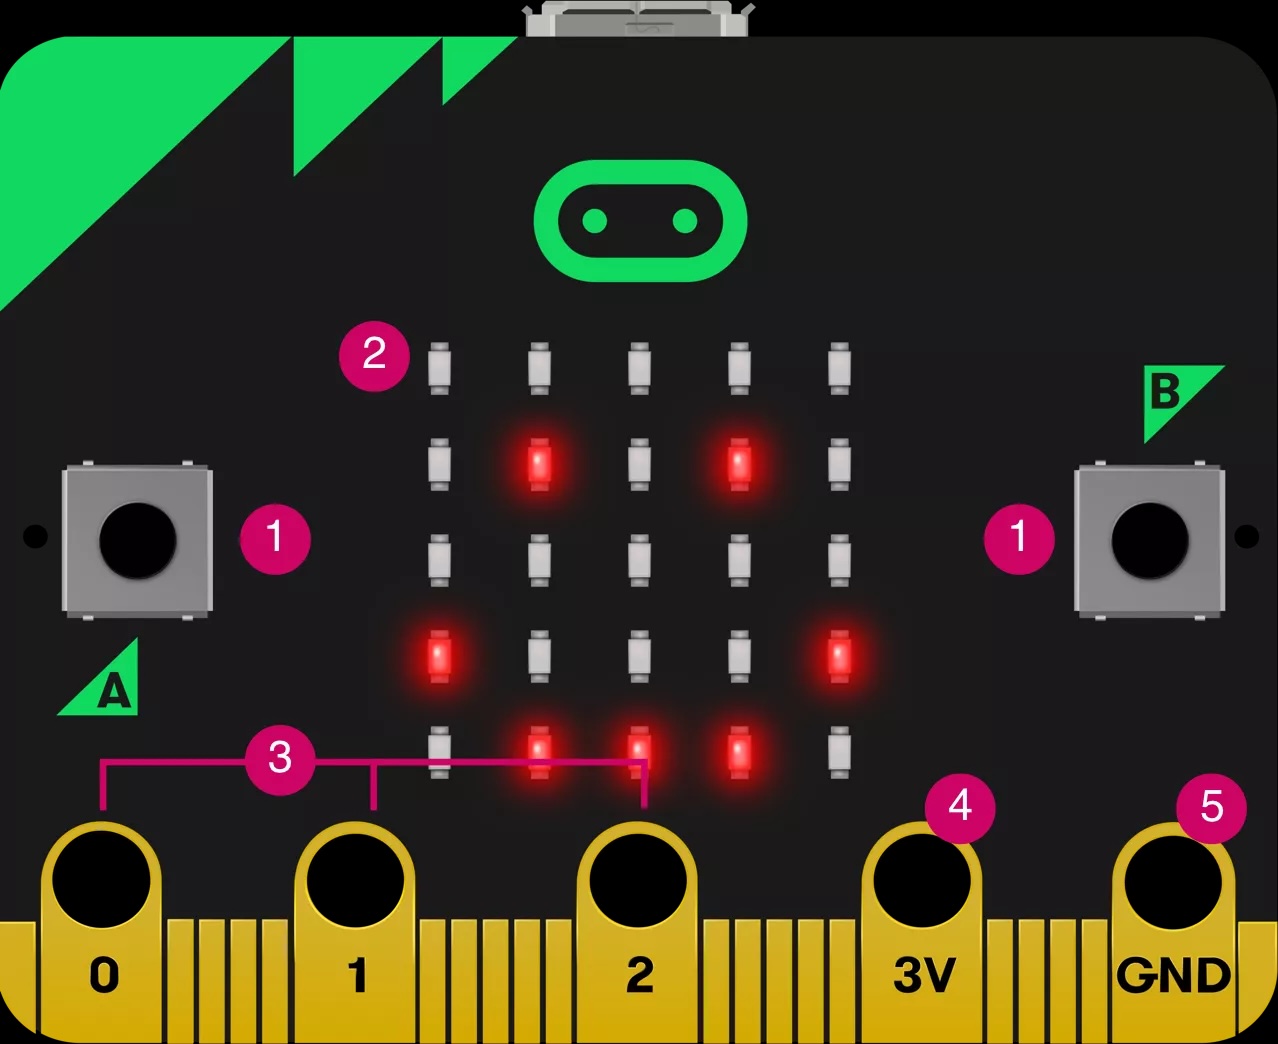
The concepts learned in Scratch also apply to other lessons, such as Micro:Bit. Visit the Scratch Website to sign up and start coding!

Activity 1: Programming Language in Scratch: A Tool For Storytelling Presentation introduces coding with Scratch and helps navigate the interface. It teaches programming motion, looks, sounds, events, controls, operations, variables, blocks, and sensing. The presentation also mentions control structures, conditionals, loops, and some tips on integrating Scratch in the classroom.

Activity 2: Scratch Presentation by Brandy Retasket helps set up a Scratch Education Account and implement Scratch in the classroom. Also included are ideas for Scratch activities, inspirational resources, Scratch tutorials, and examples of student work.

Activity 3: Coordinate Plane and Scratch Lesson helps teachers model canvas coordinates and create event scripts along X and Y axes in Scratch. Teachers can also model drawing lines that represent the X and Y axes and calculating the distance between two points. 

Activity 4: Block Coding Implementation (by Abbi Coy and Carissa Willey from Purdy) shows examples of Scratch and Micro:Bit in middle school classrooms.

Activity 5: Pinnguaq Video Tutorials on Scratch.

Activity 6: CS First has several coding lessons on many topics. These range in difficulty, so that teachers can choose activities appropriate for their students' skill levels. The website also provides tips and videos about joining a coding community and supporting students.

Here are three 45-90 minute Sample Scratch Lessons:

Move to advanced coding concepts

Introduction to Alice Presentation provides an introduction to Alice, a block-based drag-and-drop programming software used to create animations, build interactive narratives, or program simple games. The presentation helps teachers build a new world, add and place objects, create an event, and add variables or parameters. It also mentions conditionals, functions, methods, and loops.

Advanced Alice Presentation provides detailed instructions for creating a place in Alice and offers several ideas and strategies for implementing Alice in your classroom. The activities in this presentation require skills learned in the Introduction to Alice.

Contact Dr. Razib Iqbal at RIqbal@MissouriState.edu for questions about Block Coding.

Bulbs, Batteries, and Wires

Bulbs, Batteries, and Wires Module

The CODERS team has designed several lessons on bulbs, batteries, and wires. By teaching students how to design and operate working electrical circuits, these lessons help teachers introduce students to circuitry. Students who participate in these lessons learn about the flow of electricity necessary for simple and complex electronics. This shows students the level of complexity necessary for the most basic electronics. It also teaches them one way that electronics can process information. 

Activity 1: Batteries and Bulbs Presentation

  • Explains the terminology used when referring to an electric circuit, batteries, and wires/bulbs via a water analogy.

  • Covers how electricity moves through a circuit and how it can be measured.

  • Details how to draw a shorthand circuit and instructions for students to create their own circuit.

To connect the lesson to coding, students can use Scratch and create commands to make the lightbulb light up.

Activity 2: Bulbs, Batteries & Wires Lesson Plan 1

  • Explains the components of a circuit i.e. the battery, wires, bulb, and the electricity/chargers.

  • Students will create a circuit and share how electricity is moving within the circuit.

Activity 3: Bulbs, Batteries & Wires Lesson Guide for Teachers Part 1

  • Explains the concepts for Lesson Plan 1.

  • Provides a suggested guide to navigating the discussion.

Activity 4: Bulbs, Batteries & Wires Lesson Plan 2

  • Discusses the flow of electric charges and introduces the diagram symbols used to draw a circuit.

  • Uses a circuit diagram to explain the similarities and differences in series and parallel connections.

  • Students construct the circuits themselves and write observations about varying lightbulb’s brightness and the connections those bulbs have.

Activity 5: Bulbs, Batteries & Wires Lesson Guide for Teachers Part 2

  • Discusses the different types of connections, series and parallel, that can be made in circuits and how that can aid our understanding of what is going on inside.

Activity 6: Bulbs, Batteries & Wires Lesson Plan 3

  • Students use the circuit design created in Lesson 2 to calculate the current flowing through the circuit and the resistance of the lightbulb before predicting the bulb brightness in both series and parallel circuits using their understanding of Ohm’s Law.

Activity 7: Water Analogy and Circuit Observations Worksheets

Career Connections

STEM, Computer Science, and Career Coding Modules

Career Connections is one of six modules developed through the Computer Science Opportunities Development & Education in Rural School’s U.S. Department of Education grant. These lessons are developed for grades 3-8. Choose one of the lessons below or share with us what you developed. Complete the lesson reflection. And, don’t forget to share your lessons with us!

Activity 1: Four-Part Career Exploration by Abbi Coy at Purdy Middle School.

  • This lesson includes a PowerPoint, links to videos and a worksheet.

  • Introduce students to a variety of computer science and coding careers.

  • Includes a worksheet for students to complete about necessary skills in the careers. Students create a “Help Wanted” poster for the career and skills they researched.

  • Students present their posters to the class.

Activity 2: Videos (for bell ringers and other lesson plans)

We will update videos monthly.

The IF/THEN® Collection has posters, videos, and lessons that highlight authentic images of women in surprising STEM careers.

Activity 3: Match Your Interests

Have students complete career interest quizzes.

Computational Thinking

Computational Thinking Module

Computational Thinking (CT) is a problem-solving skill that helps students break apart problems so they can better understand the process of how to solve the problem. This process involves: 1) decomposing the problem into smaller, more understandable parts; 2) observing patterns or connections between the smaller parts of the problem; 3) determining what steps or computations (algorithms) need to be calculated to solve the problem; and 4) solving the problem but also able to justify their reasoning for how they came to their answer.

Please complete a reflection after teaching the lesson(s). The first two reflections are due October 4. The CT links provide PowerPoints and standards-aligned lesson plans to introduce CT in grades 3-8.

If you are new to CODERS curriculum, complete a reflection, give us feedback on the lessons, and share your modifications. We would love to hear how the lesson(s) went. Lesson reflections are required for 2024 CODERS Program participants.

Activity 1: Computational Thinking Overview Presentation developed by Dr. Razib Iqbal, Programming Logics and States.

Activity 2: Computational Thinking: Problem Solving, Debugging, and Optimizing Code

  • Students will learn to identify a problem, brainstorm solutions, and solve the problem.

  • Students will learn to develop an outline or flow chart into code, and then learn how to debug and optimize the code.

Activity 3: Interlinking Cubes and 3D figures to explore Logical Thinking Using Perspective.

Activity 4: Written Programming or Written Programming?

Activity 5: Fibonacci Numbers Introductory Lesson

  • Challenges students to analyze, solve problems about, and produce real life scenarios involving Fibonacci numbers.

  • Encourages students to code the scenarios they create.

  • Features extra resources for learning about and using Fibonacci numbers.

Activity 6: Student Standards and Teacher Resources from ISTE (International Society for Technology in Education) 

  • This blog post explains the four elements of computational thinking: decomposition, pattern recognition, abstraction, and algorithm design. 

  • These student learning standards can help you choose learning objectives for each CT lesson. 

  • This e-book provides many teacher resources for teaching CT, including suggestions for lessons focused on each of the four elements of CT. 

Please contact Dr. Diana Piccolo at DPiccolo@MissouriState.edu for questions about Computational Thinking.

Cutebot

Cutebot ModuleCutebot Image


Cutebot is a programmable smart machine that introduces students to block coding and robotics. You can purchase a Cutebot from the ELECFREAKS Website or via Amazon.

For Cutebot use, we also reccommend purchasing this pair of electronics needle-nose pliers via Amazon. 

Cutebot can be programmed with Micro:Bit. Programming Cutebots allows students to practice block coding and see its effects in the physical environment. This practice gives students first-hand programming experience and shows them that digital work can have physical effects. Use the materials below to help your students use Cutebot.

Activity 1: Cutebot Line Tracking Lesson (Dr. Razib Iqbal at MSU. Modified for middle school by Jennifer Jackson at Logan-Rogersville Middle School)

  • Shows how to program Cutebots to follow a path. Each Cutebot comes with a figure-8 paper track, which can be used with this lesson.

  • For those who want custom Cutebot tracks, electrical tape or black tempera paint make lines that Cutebots will follow.

Activity 2: Cutebot Distance Lesson (Dr. Razib Iqbal at MSU. Modified for middle school by Jennifer Jackson at Logan-Rogersville Middle School)

  • Shows how to measure the effects of friction on Cutebot movement.

Activity 3: Cutebot Instruction Manual (Elecfreaks)

  • Published by Cutebot manufacturer Elecfreaks, this manual covers Cutebot basics: a parts-list and set-up guide.

  • It also has fifteen “instructional cases.” Each one poses a problem for Cutebots and explains solving that problem.

Activity 4: Cutebot Obstacle Avoidance 

  • Shows how to program Cutebot to avoid obstacles.

Activity 5: Remote Controlled Cutebot

  • Shows how to program a Micro:Bit into a remote control for Cutebot.  

  • Provides step-by-step programming instructions. 

Contact Dr. Razib Iqbal at RIqbal@MissouriState.edu for questions about Cutebots.

Drones

Drone Module

The CODERS team has designed a presentation on how to power, charge, and operate a drone. Additionally, information on how to enter flight directions and commands in Blockly, as well as some activities to practice flying the drone are mentioned. Lastly, an introduction to the CoDrone EDU is provided, as well as a list of features that students can manipulate while block coding with the drone.

  • A CoDrone EDU is a programmable drone used to enhance learning in the classroom. Students will learn the basics of Block coding with this drone. It features 7 different sensors and programmable lights and sounds which can be coded to allow students to create their own applications, controls, and draw sensor data on the screen.

  • The Drone.ppt presentation provides an overview of the CoDrone Mini. It discusses how to power, charge, and operate the drone. Additionally, information on how to pair the drone and its controller, how to use the remote, and how to perform flight directions and commands in Blockly, as well as some activities to practice flying the drone are also included.

  • Begin Block coding with the Drone with access Blockly.

Force, Motion, and Friction

Force, Motion, and Friction Module

The CODERS team has created a lesson about Force, Motion, and Friction—principles that are operative in the physical world, but can be measured and manipulated by digital work. For example, Micro:Bit can be programmed to measure friction. The presentation below can introduce you and your students to these principles.

Force, Motion, and Friction Presentation (via CODERS): The CODERS PowerPoint on Force, Motion, & Friction helps familiarize teachers and students with vocabulary and key concepts for this topic. It also demonstrates several ways of creating, manipulating, and measuring friction—including doing so with Cutebot and Scratch coding.

Intro to Computers

Introduction to Computers Module 

Activity 1: Introduction to Computer Parts Lesson Plan and Inventory Worksheet

  • The lesson plan outlines introducing students to basic computer parts like monitors, keyboards, and fans. 

  • The inventory worksheet gives students space to record what they know about each computer part listed.

Activity 2: Build and Use a Personal Computer

  • Raspberry PI Setup Presentation provides detailed instructions putting together the hardware and programming the software of a Raspberry PI (version 4), a build-it-yourself computer kit. 

  • The presentation also explains the differences between hardware and software. 

  • Purchase a Raspberry PI (version 4) from Labists. Note: this kit must be connected to a monitor, sold separately. 

Activity 3: Dismantling and Repairing Keyboards

  • Dismantling and Rebuilding a Keyboard (via MakeZine.com): The CODERS Program recommends starting keyboard projects by following this step-by-step guide for information on how to change the shell of a keyboard from plastic to wood. Important Note: You do not have to make a wooden keyboard shell to complete this project. You can reuse the keyboard’s original shell to complete the project without changing the shell. The step-by-step guide helps with this project. Completing this project challenges students to take apart and rebuild a keyboard while making sure it still works. Overcoming this challenge teaches students about every part of the keyboard, and this knowledge helps them with other keyboard projects.

  • Recycling Keyboards into Christmas Wreaths (via MakeZine): The article explains how old keyboards can be recycled into Christmas wreaths. The wreaths do not function electronically, but the project introduces students to the inner workings of keyboards and helps prepare them for electronic projects. This project could help introduce younger students to keyboard electronics.

  • Upgrading a Keyboard for $40 (via YouTube): The video shows the basics of upgrading keyboards, and the project is incredibly cost-effective. The entire upgrade costs only $40. This video works as both a step-by-step guide and a template for other projects. On one hand, if you want to use the video as a step-by-step guide, you could buy and upgrade the kind of keyboard in the video in the same way as the person in the video. On the other hand, you can use the video as a template for projects that do not use the same keyboard as the one in the video. Students can also use the video to plan their own keyboard upgrades.

  • Changing a Keyboard into a BIOS Keyboard (via YouTube): The project explained in part 1 and part 2 of this video series is a little complex. However, it can be a good way to get students excited about computer programming. The video series explains changing a regular keyboard into a BIOS keyboard. A BIOS keyboard only has the keys that operate a computer's Basic Input/Output System (BIOS). These keyboards make programming more efficient. Once a student has made one, they can program more efficiently.

Micro:bit

Micro:BitMicroBit Image

A Micro:bit is a small programmable device used to teach and experiment with coding and electronics. It has a screen, buttons, sensors, and connections for adding more components, making it a versatile tool for learning and creating tech projects. You can purchase a Micro:bit from ELECFREAKS or Amazon.

Sign up for Micro:Bit Classroom and begin creating lesson plans today. Use the Setting up MakeCode Classroom Document for more detailed instructions on how to login and set up Micro:Bit MakeCode Classroom. 

Activity 1: Introduction to Micro:bit Presentation and Lesson Plan. The presentation provides an overview of all of the components that make up a Micro:Bit and includes instructions for students to sign up for MakeCode Classroom. Additionally, there is a real-world scenario activity for students to practice coding using MakeCode. Lastly, there are suggestions on how to implement a writing component to the MakeCode activity as well as how to share students’ work. 

Activity 2: Micro:Bit Scavenger Hunt is an interactive activity that teachers can use to help students become acquainted with Micro:Bit and Coding.

Activity 3: Microsoft MakeCode is an online educational coding platform that houses Micro:Bit programming software. Micro:Bits can be programmed with block coding, and students can also use block coding to program Cutebots. For additional information on Setting Up a Micro:Bit Classroom use this document for access to an introduction, activity, and lesson plan for Micro:Bit MakeCode Classroom. 

Activity 4: Creating a MakeCode Classroom Presentation helps teachers navigate Micro:Bit MakeCode Classroom, including information such as how to start a session for students in the platform and edit code if needed, how to access student code projects, how to use the dashboard, how to save activities, and tips on how to structure Micro:Bit lessons for students.   

Activity 5: Family Involvement with Microbit Presentation seeks to gain parental support and enthusiasm for their children learning to code, by making it accessible and fun with students expressing their creativity and learning via designing their own game, rules, and dice for a Family Game Night Activity. Some examples of Student creations are featured in this presentation, as well as other suggestions on how to incorporate this activity into your classroom, and other recommendations for related projects to implement with a Micro:Bit.  

Activity 6: Visit the ELECFREAKS website to learn how to configure a Micro:Bit for voice-controlled lights, smart fans, auto windows, smart wardrobes, etc.

Activity 7: Micro:Bit Radio Communication Assignment challenges students to make two Micro:Bits communicate from a distance. The assignment is appropriate for any grade level, but it is especially good for challenging students who have a basic knowledge of Micro:Bit. 

Please contact Dr. Razib Iqbal at RIqbal@MissouriState.edu for questions about Micro:Bit.

Robot Dog

Robot Dog Module

XGO Robot Dogs, like Cutebots, are smart machines that can be programmed with Micro:Bit and Microsoft MakeCode. To help you introduce Robot Dogs into your classroom, the CODERS Program has collected the presentations and lessons below. The first two are for beginners. The last two are advanced.

Activity 1: Assembling Robot Dog and Assigning Basic Functions to It (via CODERS)

  • Introduces students to Robot Dog assembly. 

  • Explains programming three functions: following light, reacting to temperature, and responding to hunger

Activity 2: Assembling, Activating, and Assigning Basic Functions to Robot Dog (via Abbi Coy from Purdy Middle School) 

  • Introduces students to more complex Robot Dog problems.

  • Poses challenges for students to solve but does not provide answers. Instead, it encourages students to find their own by exploring the link on the final slide.

Activity 3: Robot Dog Treasure Hunt (via CODERS)

  • Provides instructions for programming the Dog to find a magnet.

  • Once programmed and activated, the Dog will move randomly until it is close enough to the magnet, Then, it will stop and play music.

Activity 4: Robot Dog Intruder Alert (via CODERS)

  • Provides instructions for programming the Dog to listen for intruders.

  • When the Dog senses intruders, it plays music as an alarm.

  • It can also send signals to other Dogs, and they will play music as well.

Contact Dr. Razib Iqbal at RIqbal@MissouriState.edu for questions about Robot Dogs.

Writing to Code

CODERS Writing Module

Writing is important for coding and computer science. In these fields, people communicate ideas, justify projects, and explain products. To help you combine writing with your CODERS lessons, we collected these materials.

Activity 1: Writing to Learn in All Disciplines (PowerPoint)

  • This PowerPoint lists writing strategies and helps implement them effectively.

Activity 2: Writing Strategies to Try with Your Coding Lessons

Activity 3: Online Technical Writing Degree or Certificate at Missouri State

Activity 4: Technical Writing Careers